


How to Hide Cables on a Desk (Without Drilling) — The Complete No-Damage Guide
TL;DR — Quick answer
If you need to hide desk cables without drilling: choose a method by desk placement and power needs. Use clamp/clip trays for multi-device desks, adhesive raceways for light, neat lines, and vertical Velcro routing + sleeves for desks in the middle of a room. Always leave ventilation around power bricks and avoid daisy-chaining power strips.
Short install timeline: measure (5–10 min), buy (same day/online), install (5–30 min depending on method).
Why this guide is different
Many “hide cables” articles list a handful of solutions. This guide gives you a practical decision framework, quantified comparisons, safety-first guidance, a printable checklist, and step-by-step installation instructions that are renter-friendly and reversible. Use it to pick the right method quickly and to avoid common mistakes that cause damage, poor performance, or safety hazards.
Which method should you choose? — Decision framework
Answer the short questions below to identify the fastest, safest solution for your setup.
-
Is your desk placed against a wall or in the center of the room?
- Against a wall: adhesive raceway or clamp tray along the back edge is often best.
- Center of room: vertical routing along a leg (sleeve + Velcro) is usually the safest renter-friendly option.
-
Are most cables low-power (USB, monitor) or high-power (PC PSU, chargers)?
- Low-power: raceways or sleeves are fine.
- High-power: prioritize trays with airflow and avoid fully enclosed boxes.
-
Do you need zero-residue when you move out?
- Yes: choose clamps, Velcro wraps, removable adhesive strips (e.g., 3M Command™ style).
- No: permanent mounts give the best durability.
-
Priority: aesthetics, durability, or cost?
- Aesthetics: paintable raceways + braided sleeves.
- Durability: clamp trays and professional under-desk trays.
- Cost: zip ties and sleeves are cheapest and fast to install.
Quick recommendation: for most renters with a typical home office, start with vertical routing + a braided sleeve + Velcro (center desks) or an adhesive raceway (against wall). If you have multiple heavy devices, use a no-drill clamp tray under the desk.
Step-by-step: Hiding desk cables without drilling
Each method below includes what it is, when to use it, required materials, exact steps, estimated time, and renter notes.
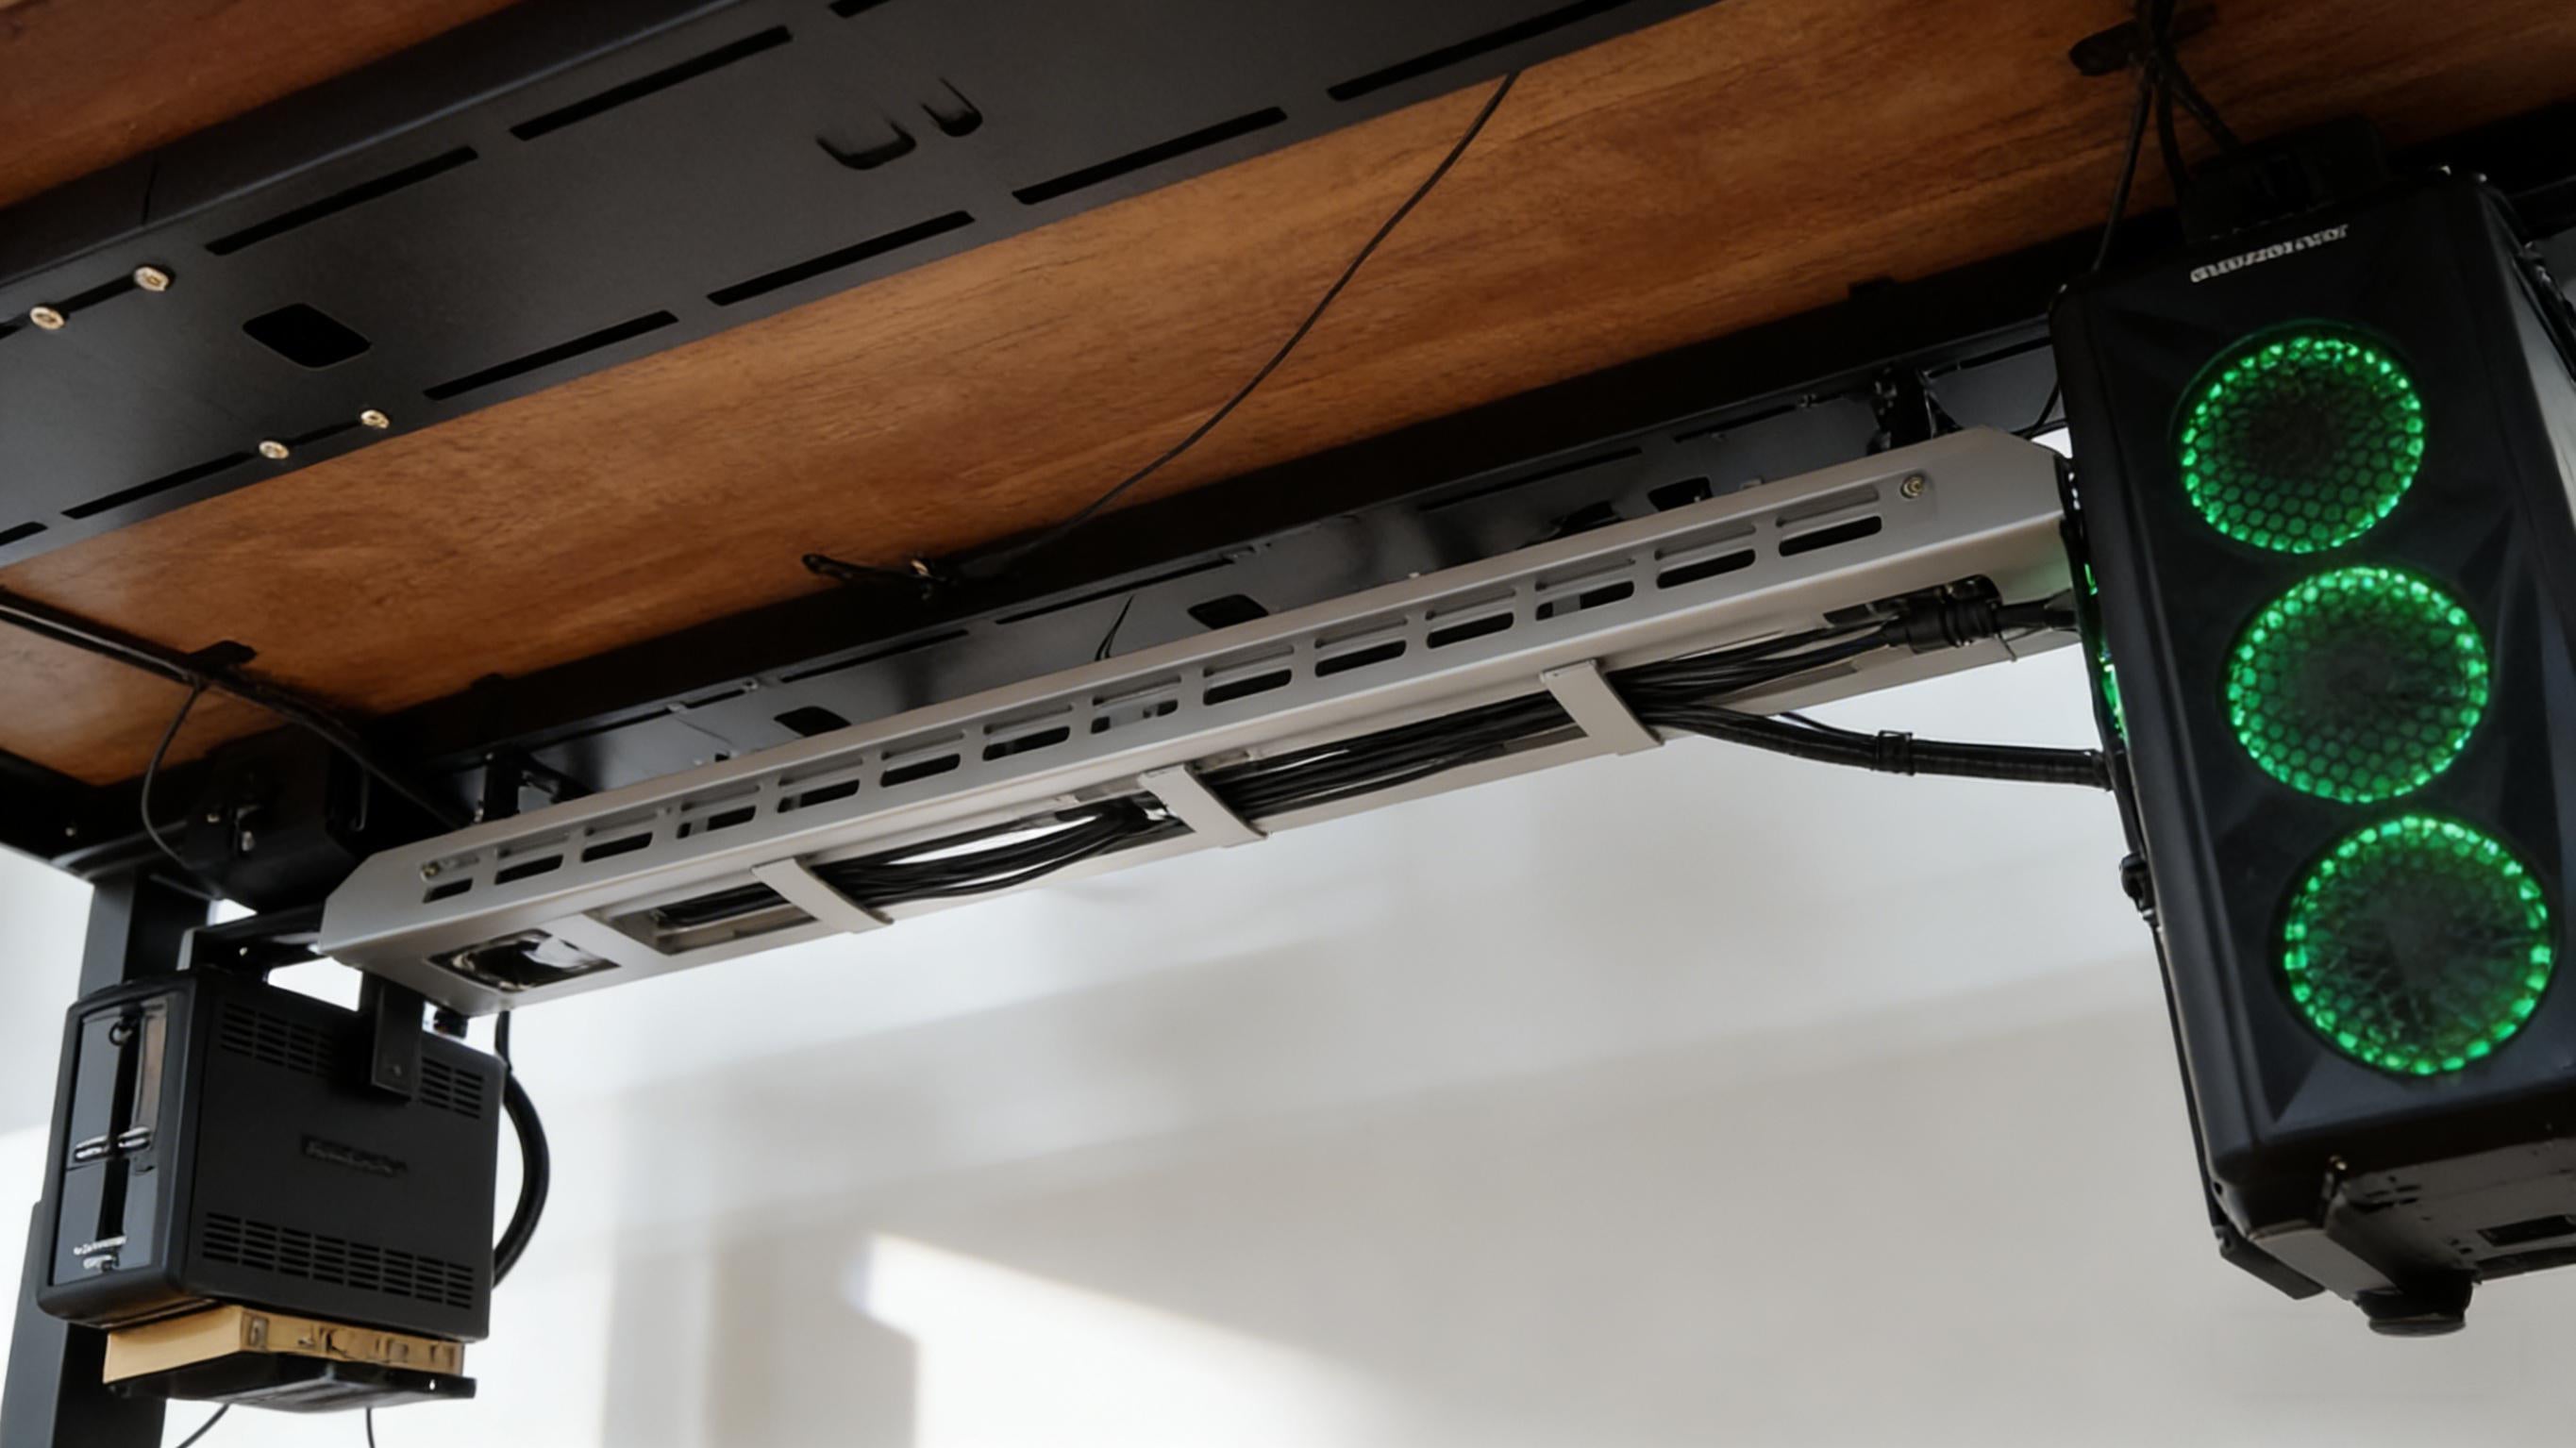
Method A — Clamp / Clip Under-desk Tray (Best for multiple heavy cables)
What: A small tray or wire basket that clamps to the underside of the desk edge (no screws).
When to use: Multi-device setups (desktop PC, monitor(s), printer, audio gear) where capacity and durability are important.
Materials
- No-drill clamp tray or under-desk basket (adjustable clamps, rubber pads)
- Velcro straps and zip ties
- Measuring tape
- Optional: cable labeling tags
Estimated time
~15–30 minutes
Installation steps
- Measure: measure the desk width and the distance from the desk back edge to the outlet. Confirm tray length fits without interfering with drawers.
- Place the tray: position the clamp where it avoids structural interference. Use protective rubber pads to protect desk finish.
- Secure clamps: tighten clamps by hand per product instructions (don’t overtighten to prevent denting).
- Route & group cables: group cables by function (power, display, USB) and use Velcro or zip ties every 12–18 in (30–45 cm).
- Position power strip/adapter: place the power strip in the tray ensuring bulky adapters have room and ventilation.
- Final check: power on devices and check for undue heat; tidy any visible cable length with a sleeve or wrap.
Renter note: choose clamp trays with rubber pads and hand-tightened screws to avoid damage.
Method B — Adhesive Cable Raceway / Channel (Best for neat edge routing)
What: Low-profile plastic raceways that snap closed and stick to the underside of a desk edge or to a wall.
When to use: Light cables (chargers, monitor cables) when you want a clean, paintable line from desk to outlet.
Materials
- Adhesive cable raceway (paintable if needed)
- High-quality removable mounting strips (for renters)
- Isopropyl alcohol & cloth (surface prep)
- Scissors or miter cutter
Estimated time
~10–20 minutes
Installation steps
- Prepare surface: clean the mounting surface with isopropyl alcohol and allow to dry.
- Measure & cut: pre-fit the raceway along the route and cut to length.
- Apply adhesive: apply the manufacturer tape or removable strips, press firmly for 30 seconds to improve initial adhesion.
- Insert cables: lay cables in the channel and snap the cover closed.
- Paint if needed: if the raceway is paintable, use a light coat of paint to match the wall or desk color.
Note: textured surfaces or repeated removals can reduce adhesion. Test a small patch first.
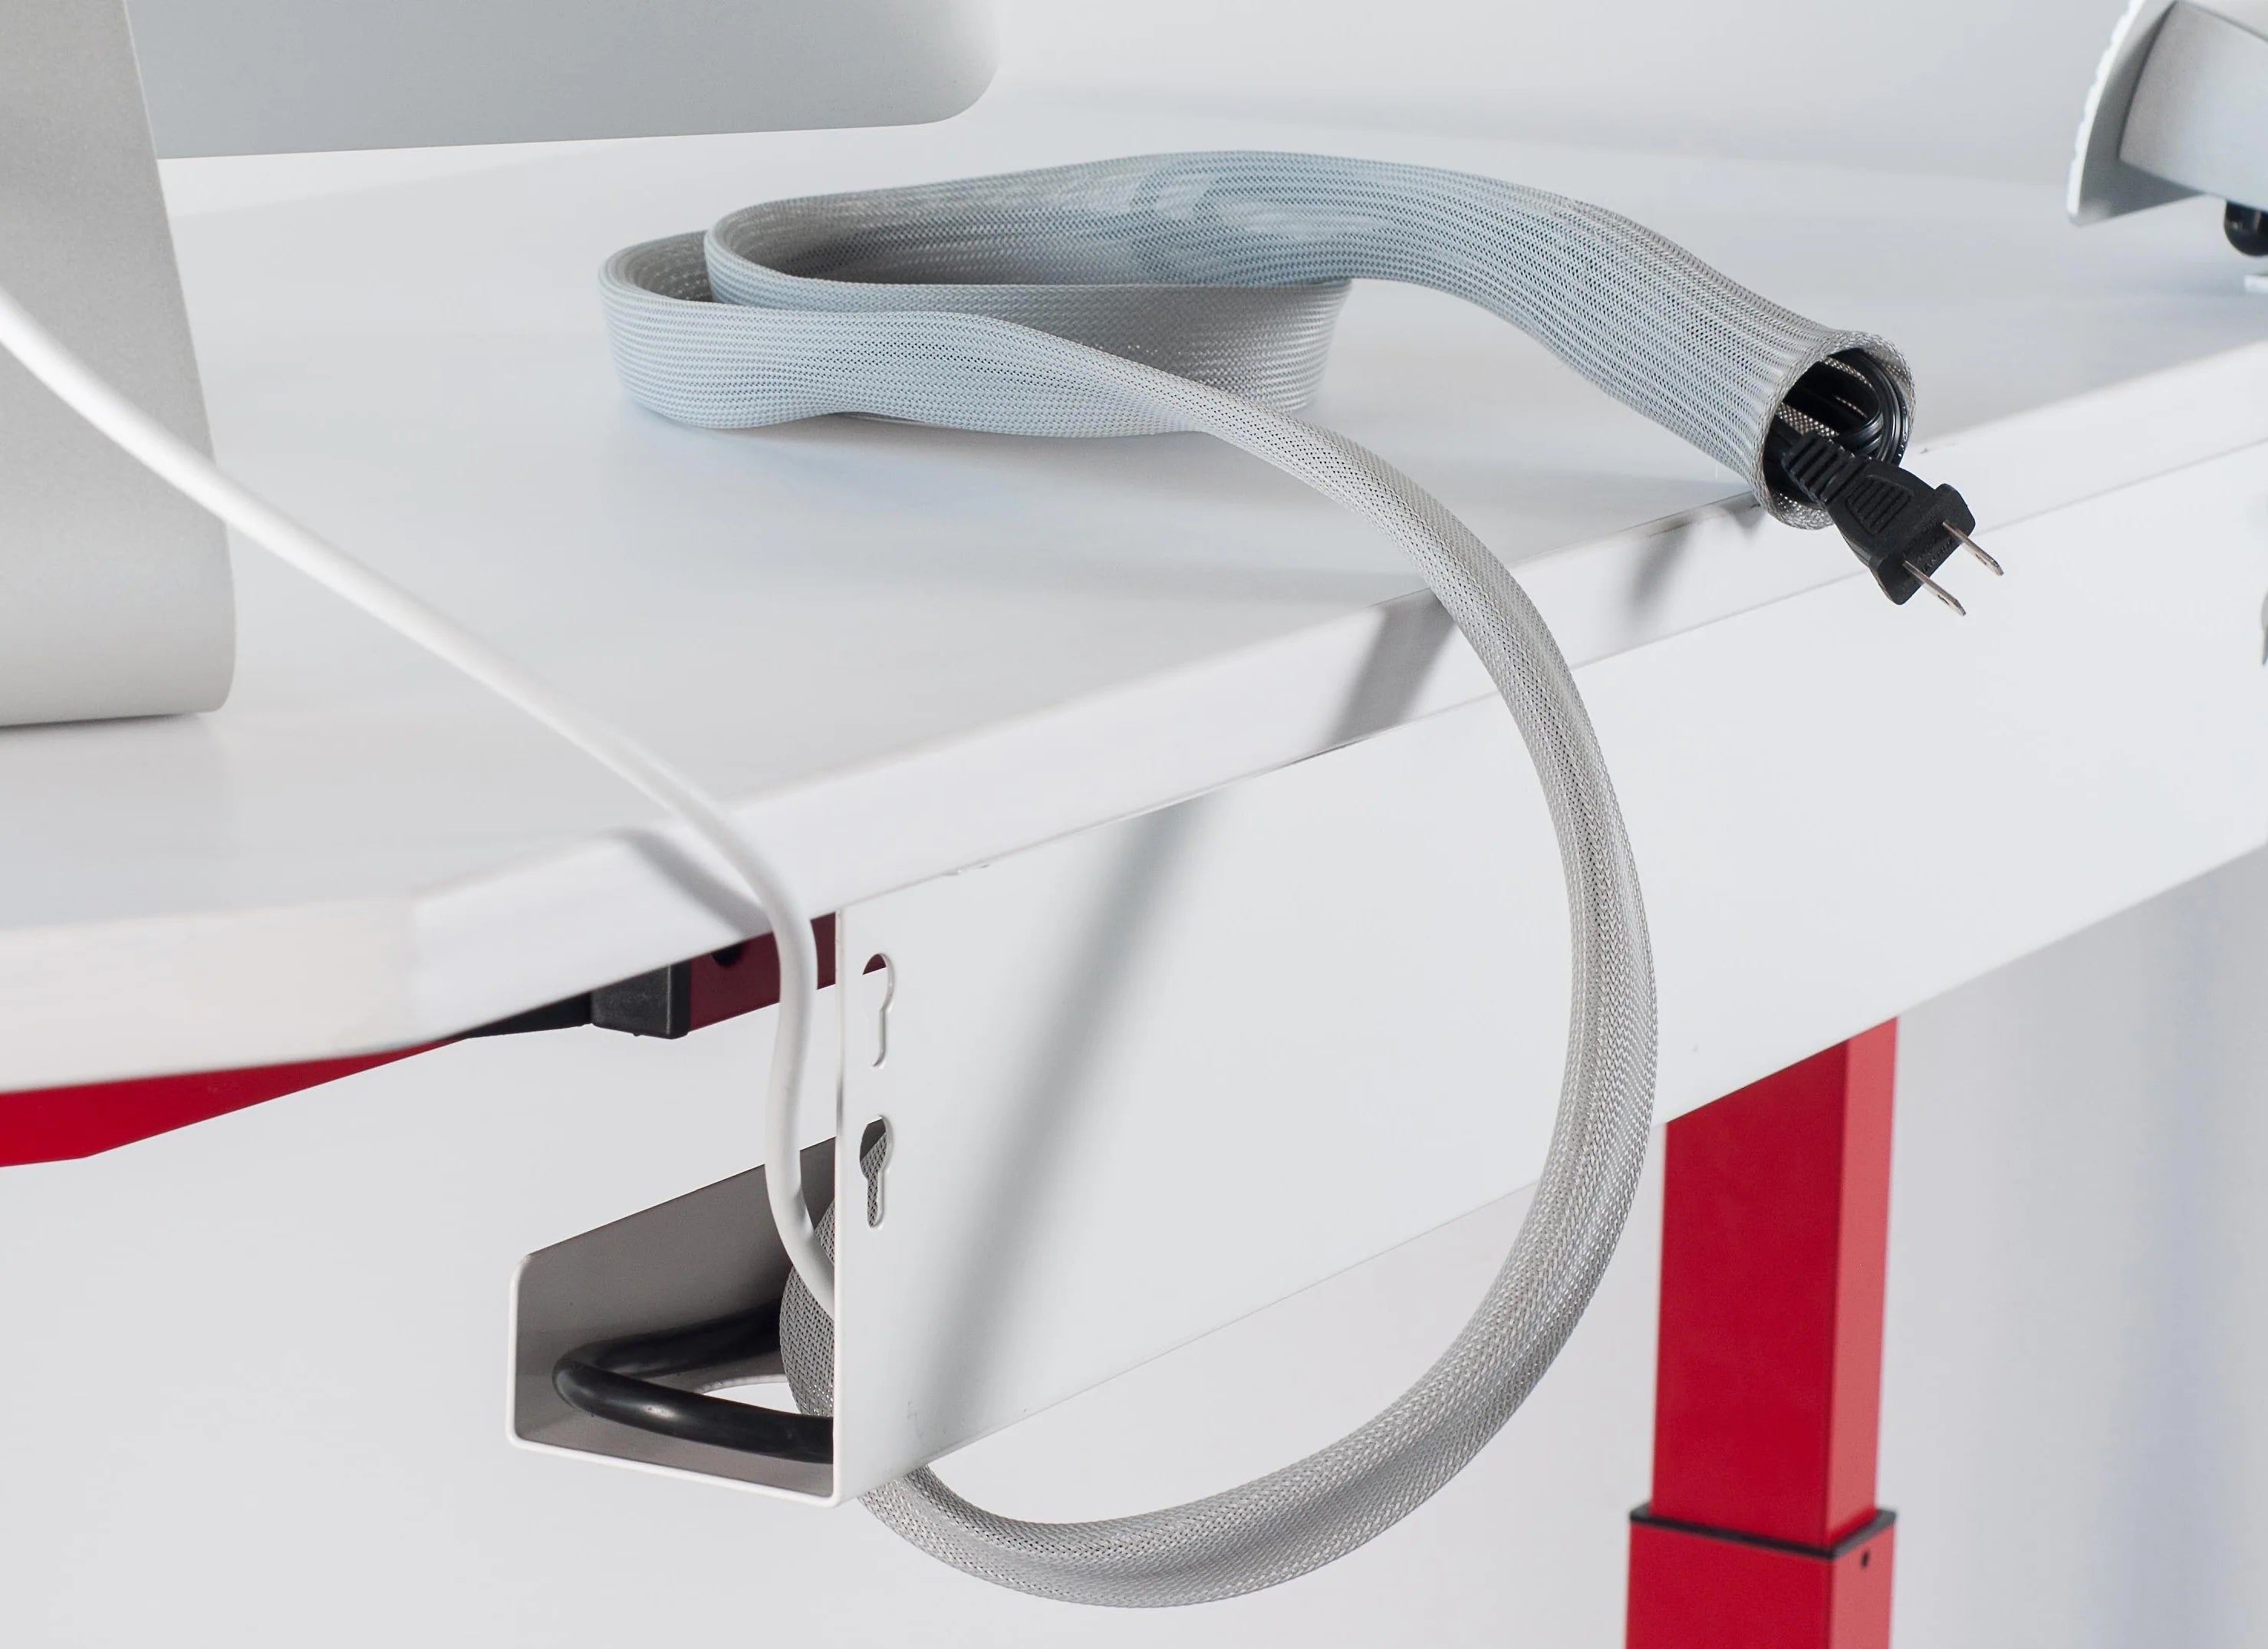
Method C — Vertical Routing & Sleeves (Best for desks placed in the middle of a room)
What: Bundle cables in a fabric or braided sleeve and route vertically down a desk leg with Velcro ties and a low-profile anchor at the floor.
When to use: desks not adjacent to a wall or when you want a renter-friendly, reversible solution.
Materials
- Braided cable sleeve (expandable)
- Velcro cable wraps
- Removable adhesive floor anchor or cable tie anchor
- Flat-plug surge protector or low-profile wall plug
Estimated time
~5–15 minutes
Installation steps
- Group cables: insert cables into the braided sleeve or zip them temporarily to create one tidy bundle.
- Attach at desk: secure the top of the sleeve to the underside of the desk with a clamp or Velcro wrap.
- Run down leg: wrap Velcro ties every 12–18 inches to secure the sleeve to the leg.
- Anchor at floor: use a removable adhesive anchor to hold the cable exit close to the baseboard or floor and route to the outlet.
Pro tip: use a flexible sleeve that allows adding or removing cables without cutting.
Safety, heat & power etiquette — what to absolutely avoid
Hiding cables is useful — but safety must come first. Below are concrete safety rules and checks to prevent overheating or electrical hazards.
Key safety rules
- Do not fully enclose heat-generating power bricks in airtight boxes. Adapters create heat; they need airflow. If an enclosure is used, it must be ventilated with gaps or perforations.
- Avoid daisy-chaining power strips (connecting multiple strips end-to-end). Use a single properly rated strip per outlet for high loads.
- Check power strip ratings before plugging in multiple devices — add the wattage of each device and ensure the strip’s capacity is not exceeded.
- Inspect periodically: once installed, feel power strips & adapters after 10–30 minutes for warmth. If warm/hot, relocate to ventilated space.
- Support flexible cords: prevent strain at connectors by supporting cables and avoiding tight bends (strain leads to insulation wear).
Simple safety test (2 minutes)
- Switch on all connected devices and let them idle for 15 minutes.
- Carefully feel each adapter and the power strip — a warm strip is normal; hot is not. If hot, unplug and relocate adapter to ventilated area.
- Confirm that any enclosure used has airflow — if not, remove or modify with ventilation.
Important: if you detect sparks, unusual smells, or persistent overheating, unplug devices and consult a qualified electrician.
Cost, time & durability comparison
| Method | Cost (USD) | Install time | Durability | Renter-friendly |
|---|---|---|---|---|
| Clamp tray (no-drill) | $15–$60 | 15–30 min | High | High |
| Adhesive raceway | $8–$30 | 10–20 min | Medium | Medium |
| Braided sleeve + Velcro | $5–$20 | 5–15 min | Medium | High |
| Cable box (closed) | $15–$40 | 5–10 min | Medium | High |
Use the table above to match budget and durability to your scenario. If in doubt, choose the most reversible option (Velcro + sleeve or clamp tray) for renters.
Materials & shopping specs — what to buy (and what to avoid)
Below are product attributes to check when buying. These help you select items that meet capacity, reversibility and safety needs.
Clamp / tray
- Clamp type: adjustable clamp with rubber pad; hand-tighten screws to avoid damage.
- Capacity: aim for 3–6 kg for multi-device setups (check product specs).
Adhesive raceway
- Adhesive: removable adhesive or manufacturer-provided adhesive — check compatibility with painted and textured walls.
- Material: paintable PVC for matching decor.
Braided sleeve & Velcro
- Sleeve diameter: choose expandable sleeves (0.5"–2" range depending on bundle size).
- Velcro ties: reusable hook-and-loop strips rated for cable bundling.
Power strips & surge protectors
- Prefer UL-listed (or equivalent) surge protectors with clear wattage/amperage ratings.
- Choose a flat plug for tight spaces behind furniture.
Printable checklist — copy & paste or print this section
Pre-installation
- [ ] Measure desk width and distance to outlet
- [ ] Count devices (list wattage for high-power items)
- [ ] Choose method (clamp tray / raceway / sleeve)
- [ ] Gather materials: tray, raceway, Velcro, braided sleeve, zip ties
Installation
- [ ] Clean mounting surfaces (isopropyl alcohol)
- [ ] Install clamp, raceway or sleeve per steps above
- [ ] Group cables and secure with Velcro/zip ties
- [ ] Secure power strip in ventilated position
Safety check
- [ ] Adapters & power strip feel warm (not hot) after 15 minutes
- [ ] No daisy-chained power strips
- [ ] Cables not routed across walkways or pinch points
Save or print this list for your move-out inspection if you're renting.
Maintenance & troubleshooting
Common issues and how to fix them.
- Adhesive failure: heat the adhesive with a hair dryer, gently remove, clean residue with adhesive remover, reapply with higher-grade removable strips.
- Loose clamps: re-seat clamp and use protective rubber pads; do not overtighten.
- Warm power strip: unplug; allow to cool; redistribute load or replace with a higher-rated strip if it remains warm.
- Adding devices: use Velcro wraps for easy access and avoid cutting sleeves unless permanently needed.
FAQ
- Can I hide cables without drilling?
- Yes — clamp trays, adhesive raceways, cable sleeves and Velcro routing are all no-drill options. Choose one based on desk placement and power needs.
- Are cable management boxes safe for power strips?
- They are safe only if the box allows ventilation and you avoid overloading the power strip. Don’t enclose high-heat adapters in a sealed box.
- What adhesive should I use for raceways?
- Use the manufacturer adhesive or high-quality removable strips. Test on a small area when surface finish matters.
- How to hide cables for a desk in the middle of a room?
- Use a braided sleeve + Velcro ties and anchor the bottom with a removable floor mount for a discreet, renter-friendly route.
