


The Ultimate Long-Form Guide to Choosing and Using a Monitor Stand or Arm for Ergonomics, Space & Productivity
Estimated read: 8–12 minutes
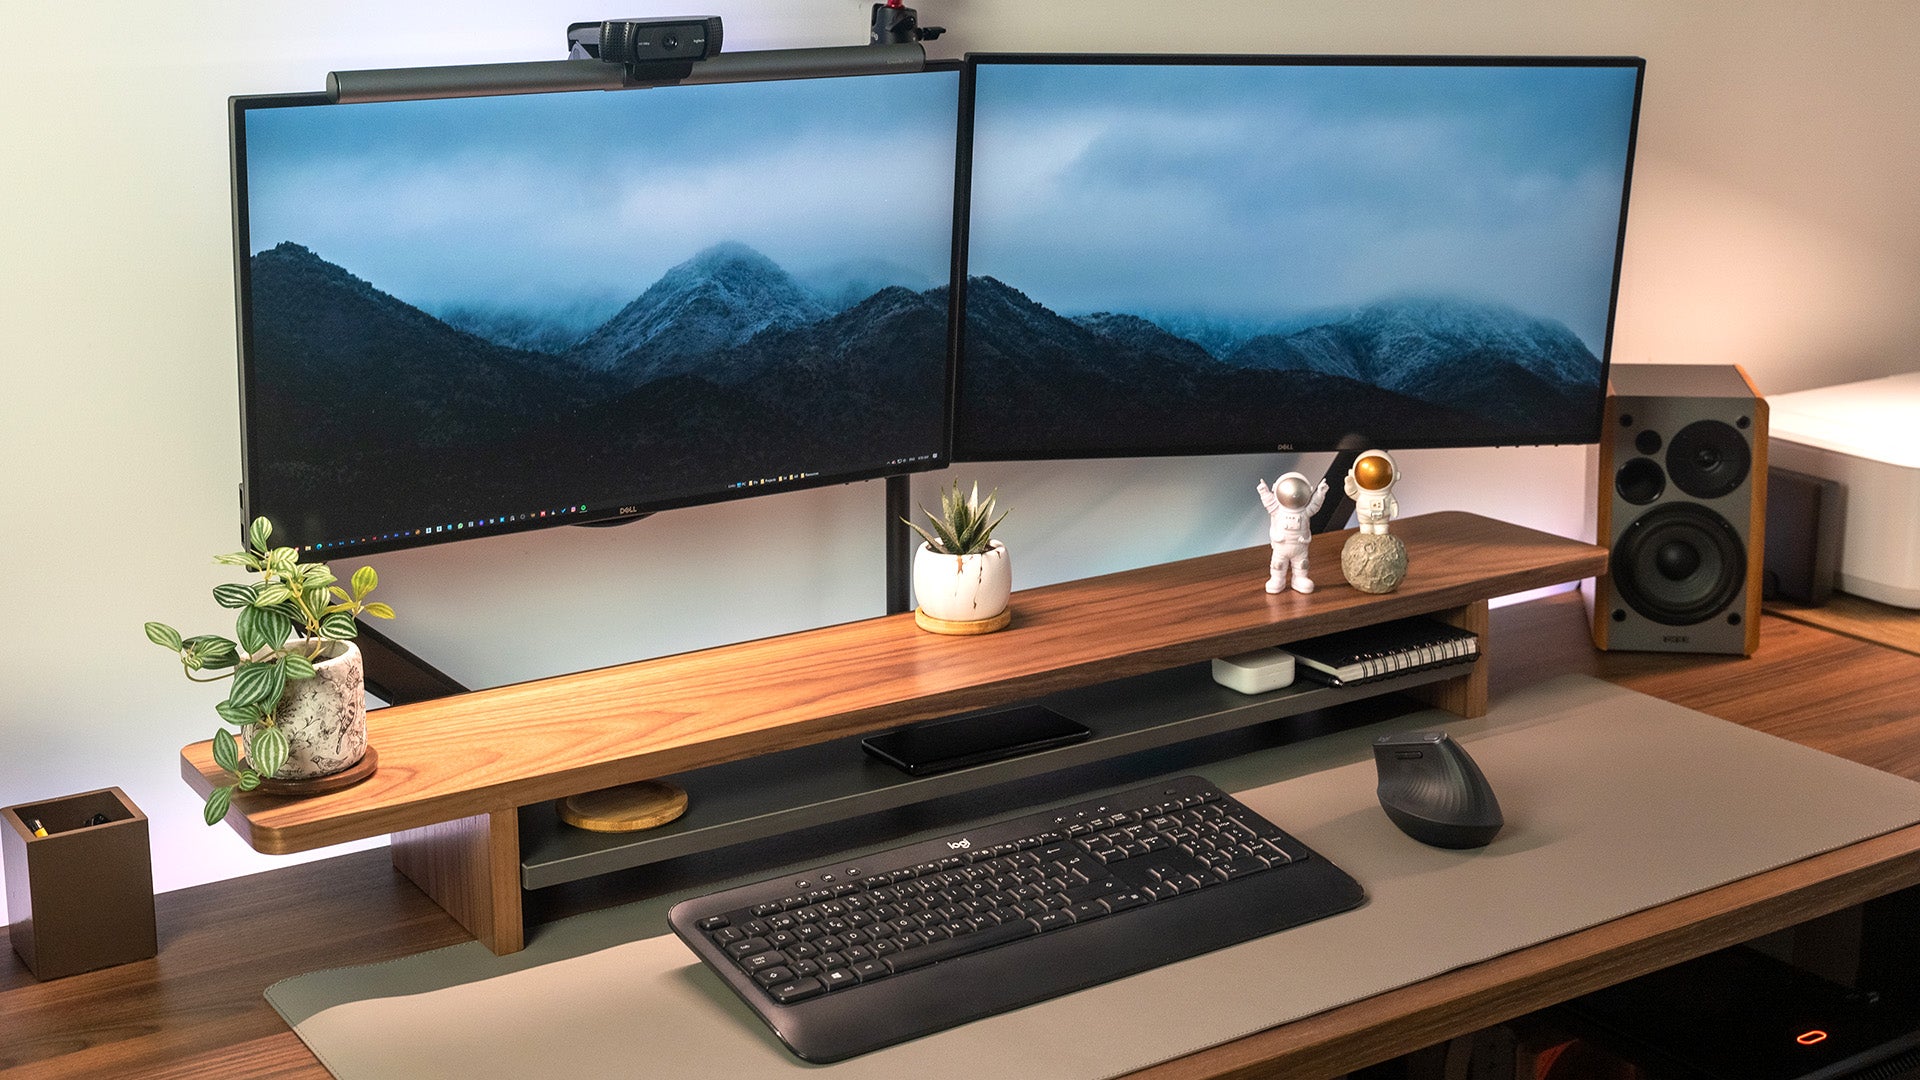
Upgrading to the right monitor stand or monitor arm is one of the highest-impact, lowest-effort improvements you can make to your workspace. This guide walks you through ergonomics, practical setup patterns, installation tips, troubleshooting, and a decision tree that helps you choose the right solution for your desk, monitor type, and workflow.
Why Your Monitor Setup Matters (Ergonomics + Productivity)
How your monitor sits on your desk affects more than just aesthetics. A monitor placed too low or too close forces you to lean forward, increasing neck and shoulder strain and reducing focus over long sessions. A properly positioned screen reduces musculoskeletal stress, improves line-of-sight comfort, and helps maintain a neutral posture.
Quick facts (practical takeaway): place the top third of the screen at or just below eye level; maintain an arm's-length distance; ensure tilt and swivel options so multiple users can find a comfortable view.
Monitor Stands vs. Monitor Arms vs. Monitor Risers — The Real Differences
Before buying, understand the three main solutions and what they’re best at:
- Monitor riser (platform): a simple elevation base that lifts the monitor a fixed amount. Best for small desks or when you want keyboard storage under the screen.
- Fixed or adjustable monitor stand: slightly more feature-rich than basic risers — might offer height adjustment, storage, or an improved footprint.
- Monitor arm (articulating or gas-spring): the most flexible solution. Supports height, tilt, swivel, rotation, and reach adjustment. Best for multi-user workstations, sit-stand desks, or multi-monitor layouts.
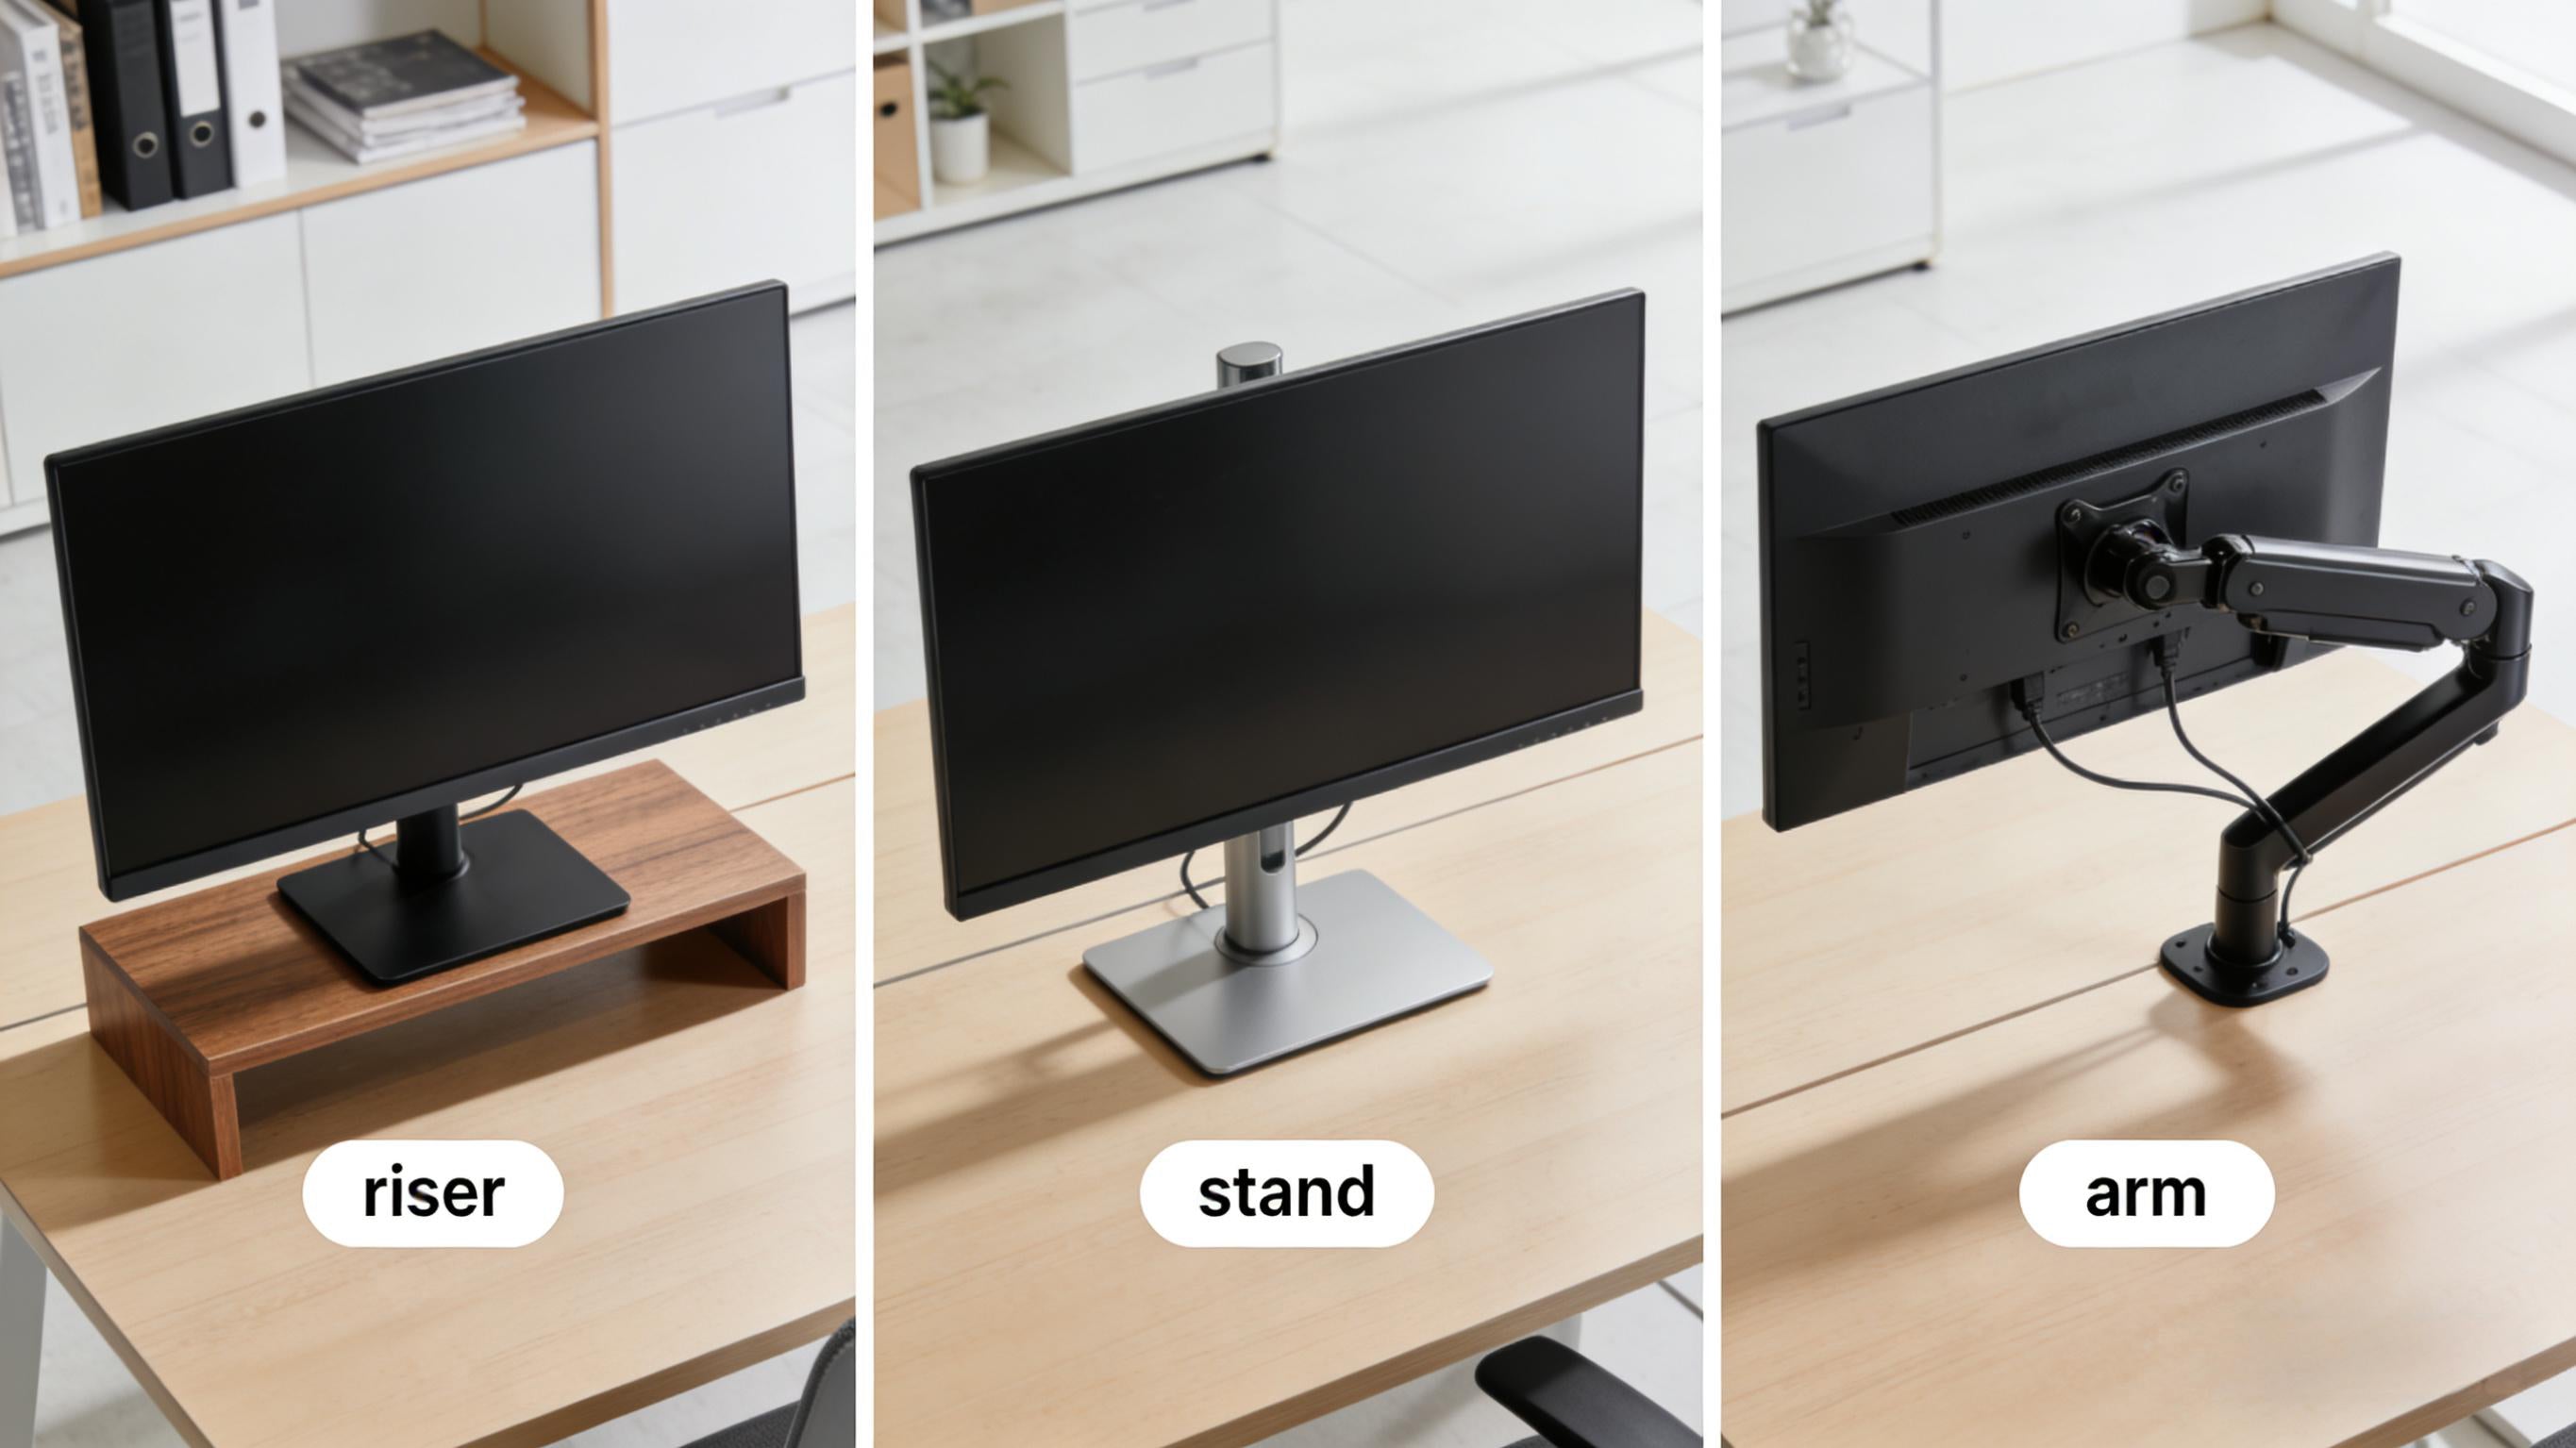
Visual comparison: riser vs fixed stand vs articulating arm.
Quick comparison table
| Solution | Flexibility | Space impact | Best for |
|---|---|---|---|
| Monitor riser | Low | Small footprint | Budget, simple uplift, laptop + monitor combos |
| Adjustable stand | Medium | Moderate | Shared desks, occasional height change |
| Monitor arm | High | Frees desk surface (clamp or grommet) | Ergonomics, sit-stand, multi-monitor setups |
The Science-Backed Ergonomics: How to Position Your Monitor
Ergonomics is simple to apply if you follow a few rules. Use these practical instructions rather than relying on guesswork.
Where to place the screen
- Vertical placement: the top third of the monitor should be at, or just below, your straight-ahead eye level.
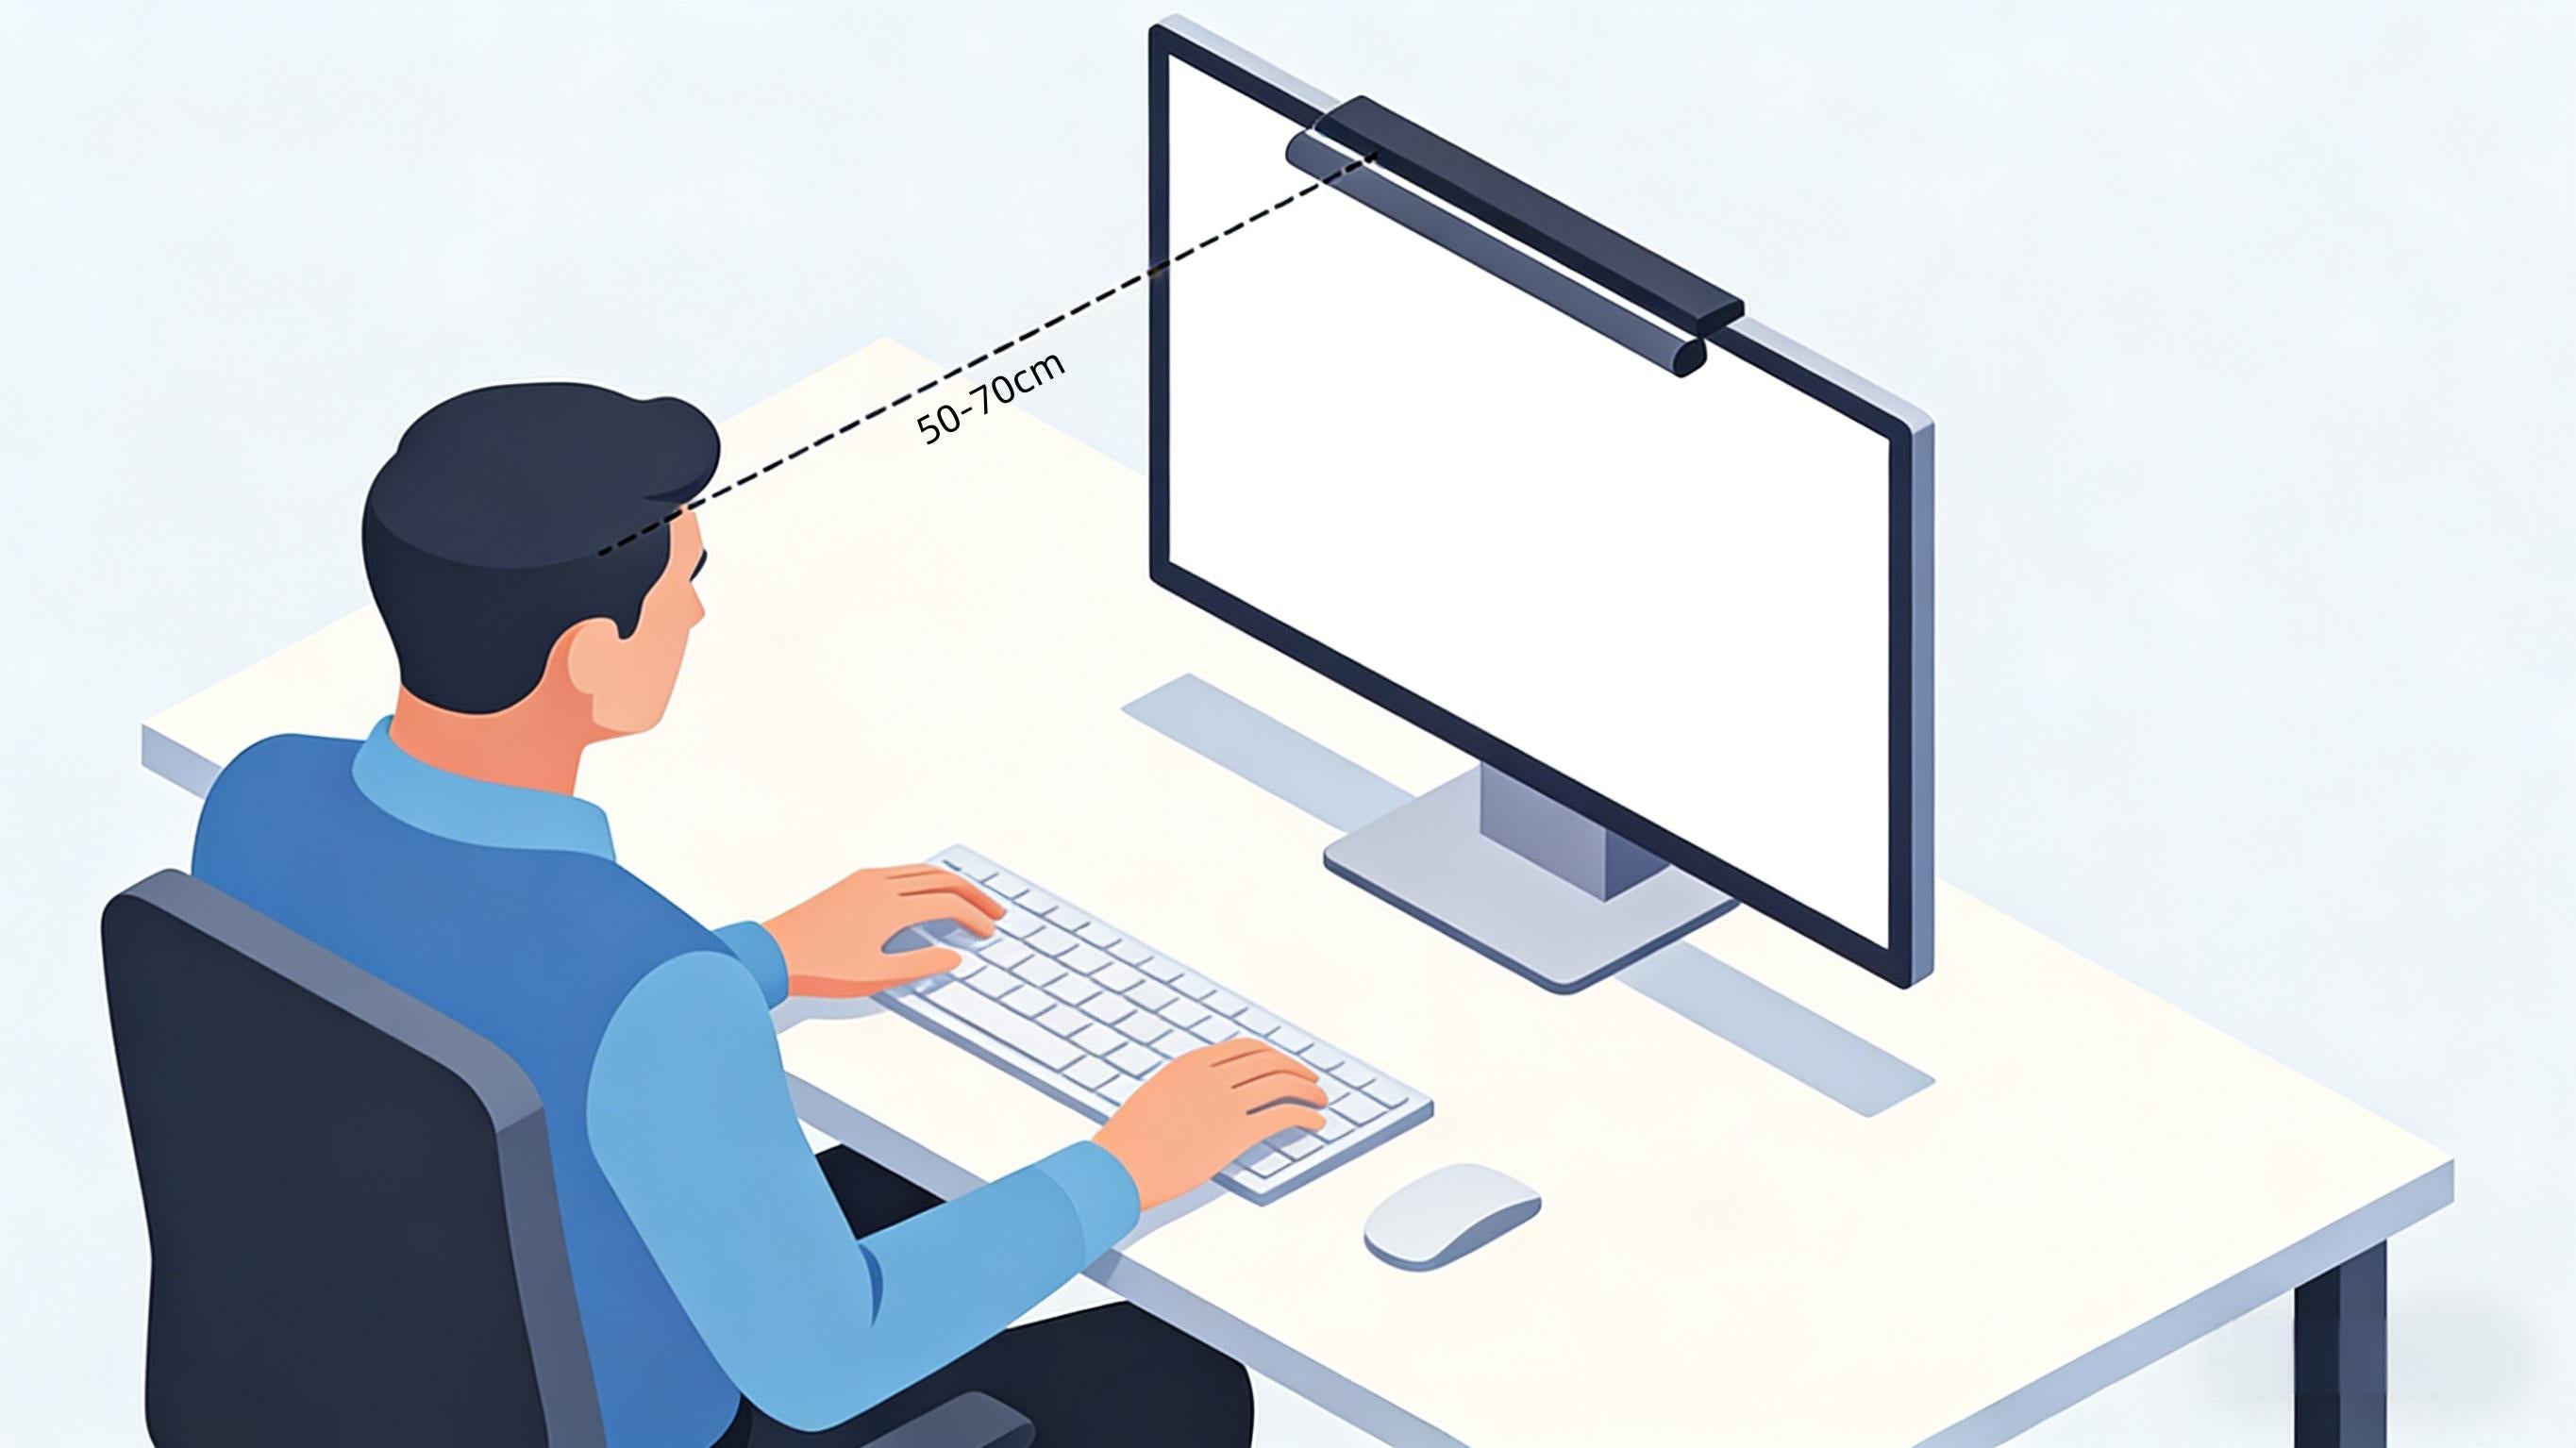
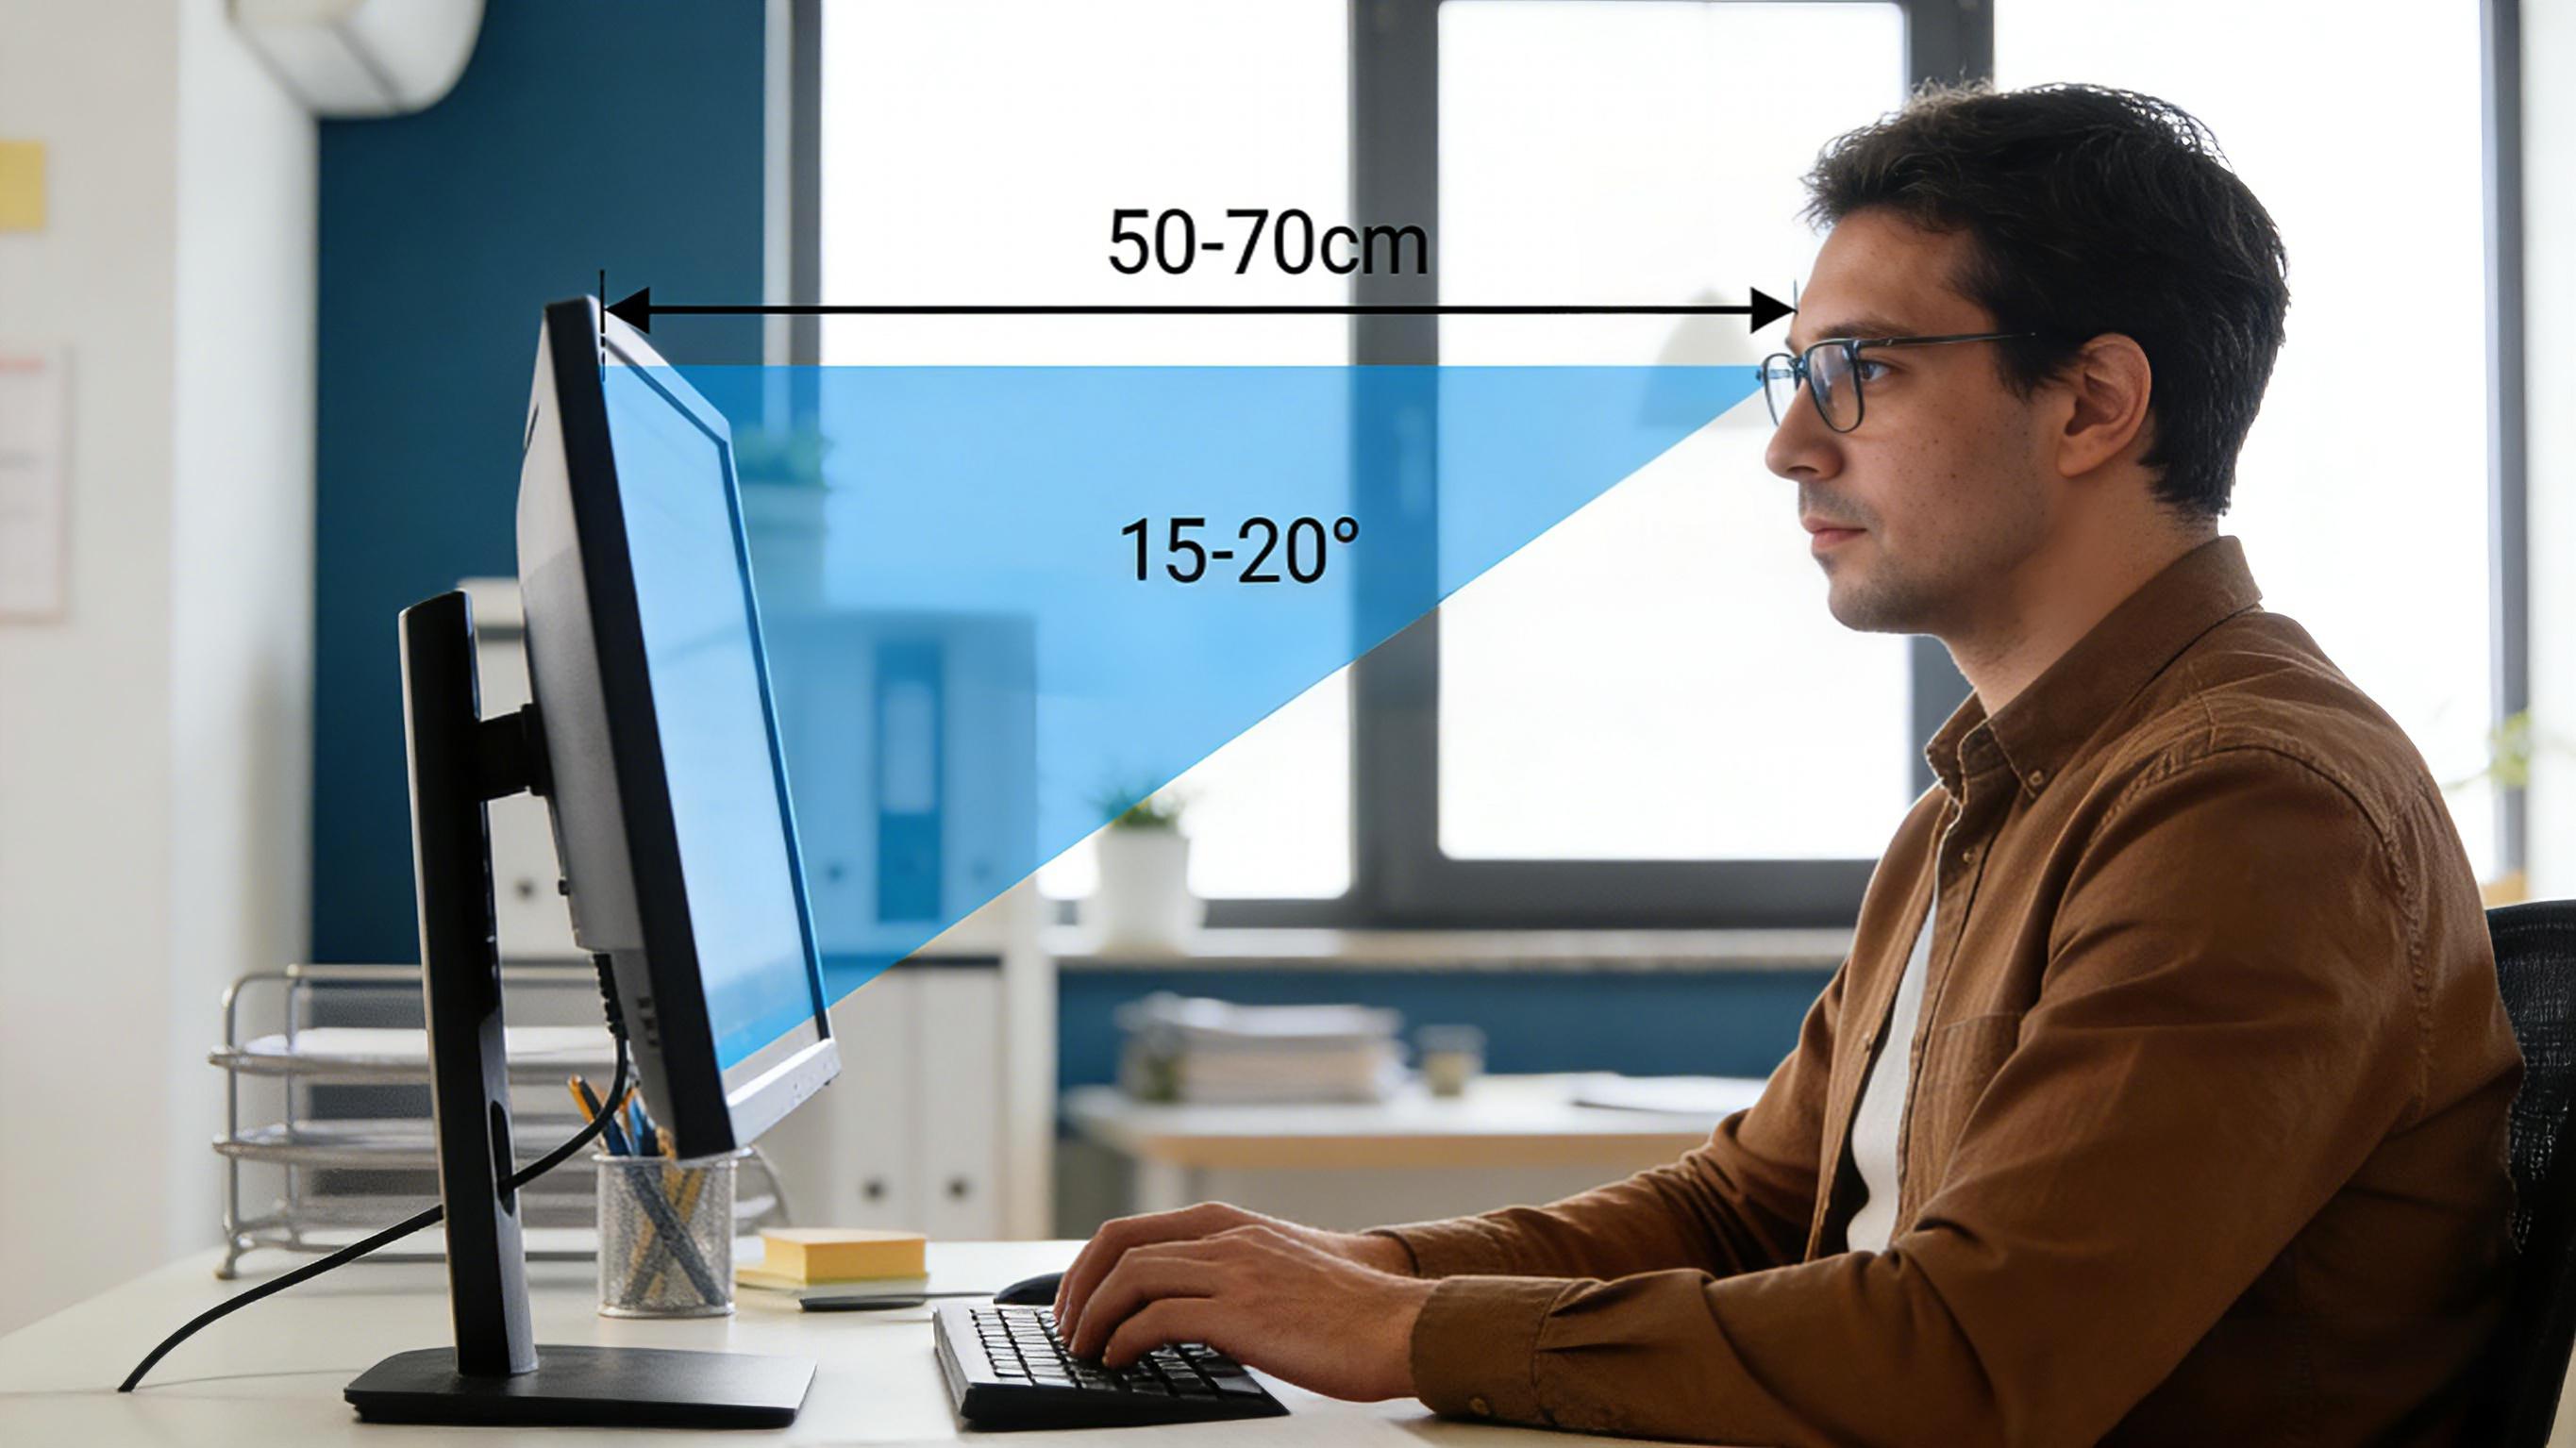
- Distance: 50–70 cm (about an arm’s length) for most people — increase distance for ultra-wide or very large displays.
- Viewing angle: a slight downward gaze of 10–20° is comfortable for reading and reduces eye strain.
These rules make monitor arms especially valuable — they let you rapidly set & lock the monitor at the ergonomic sweet spot for any user.
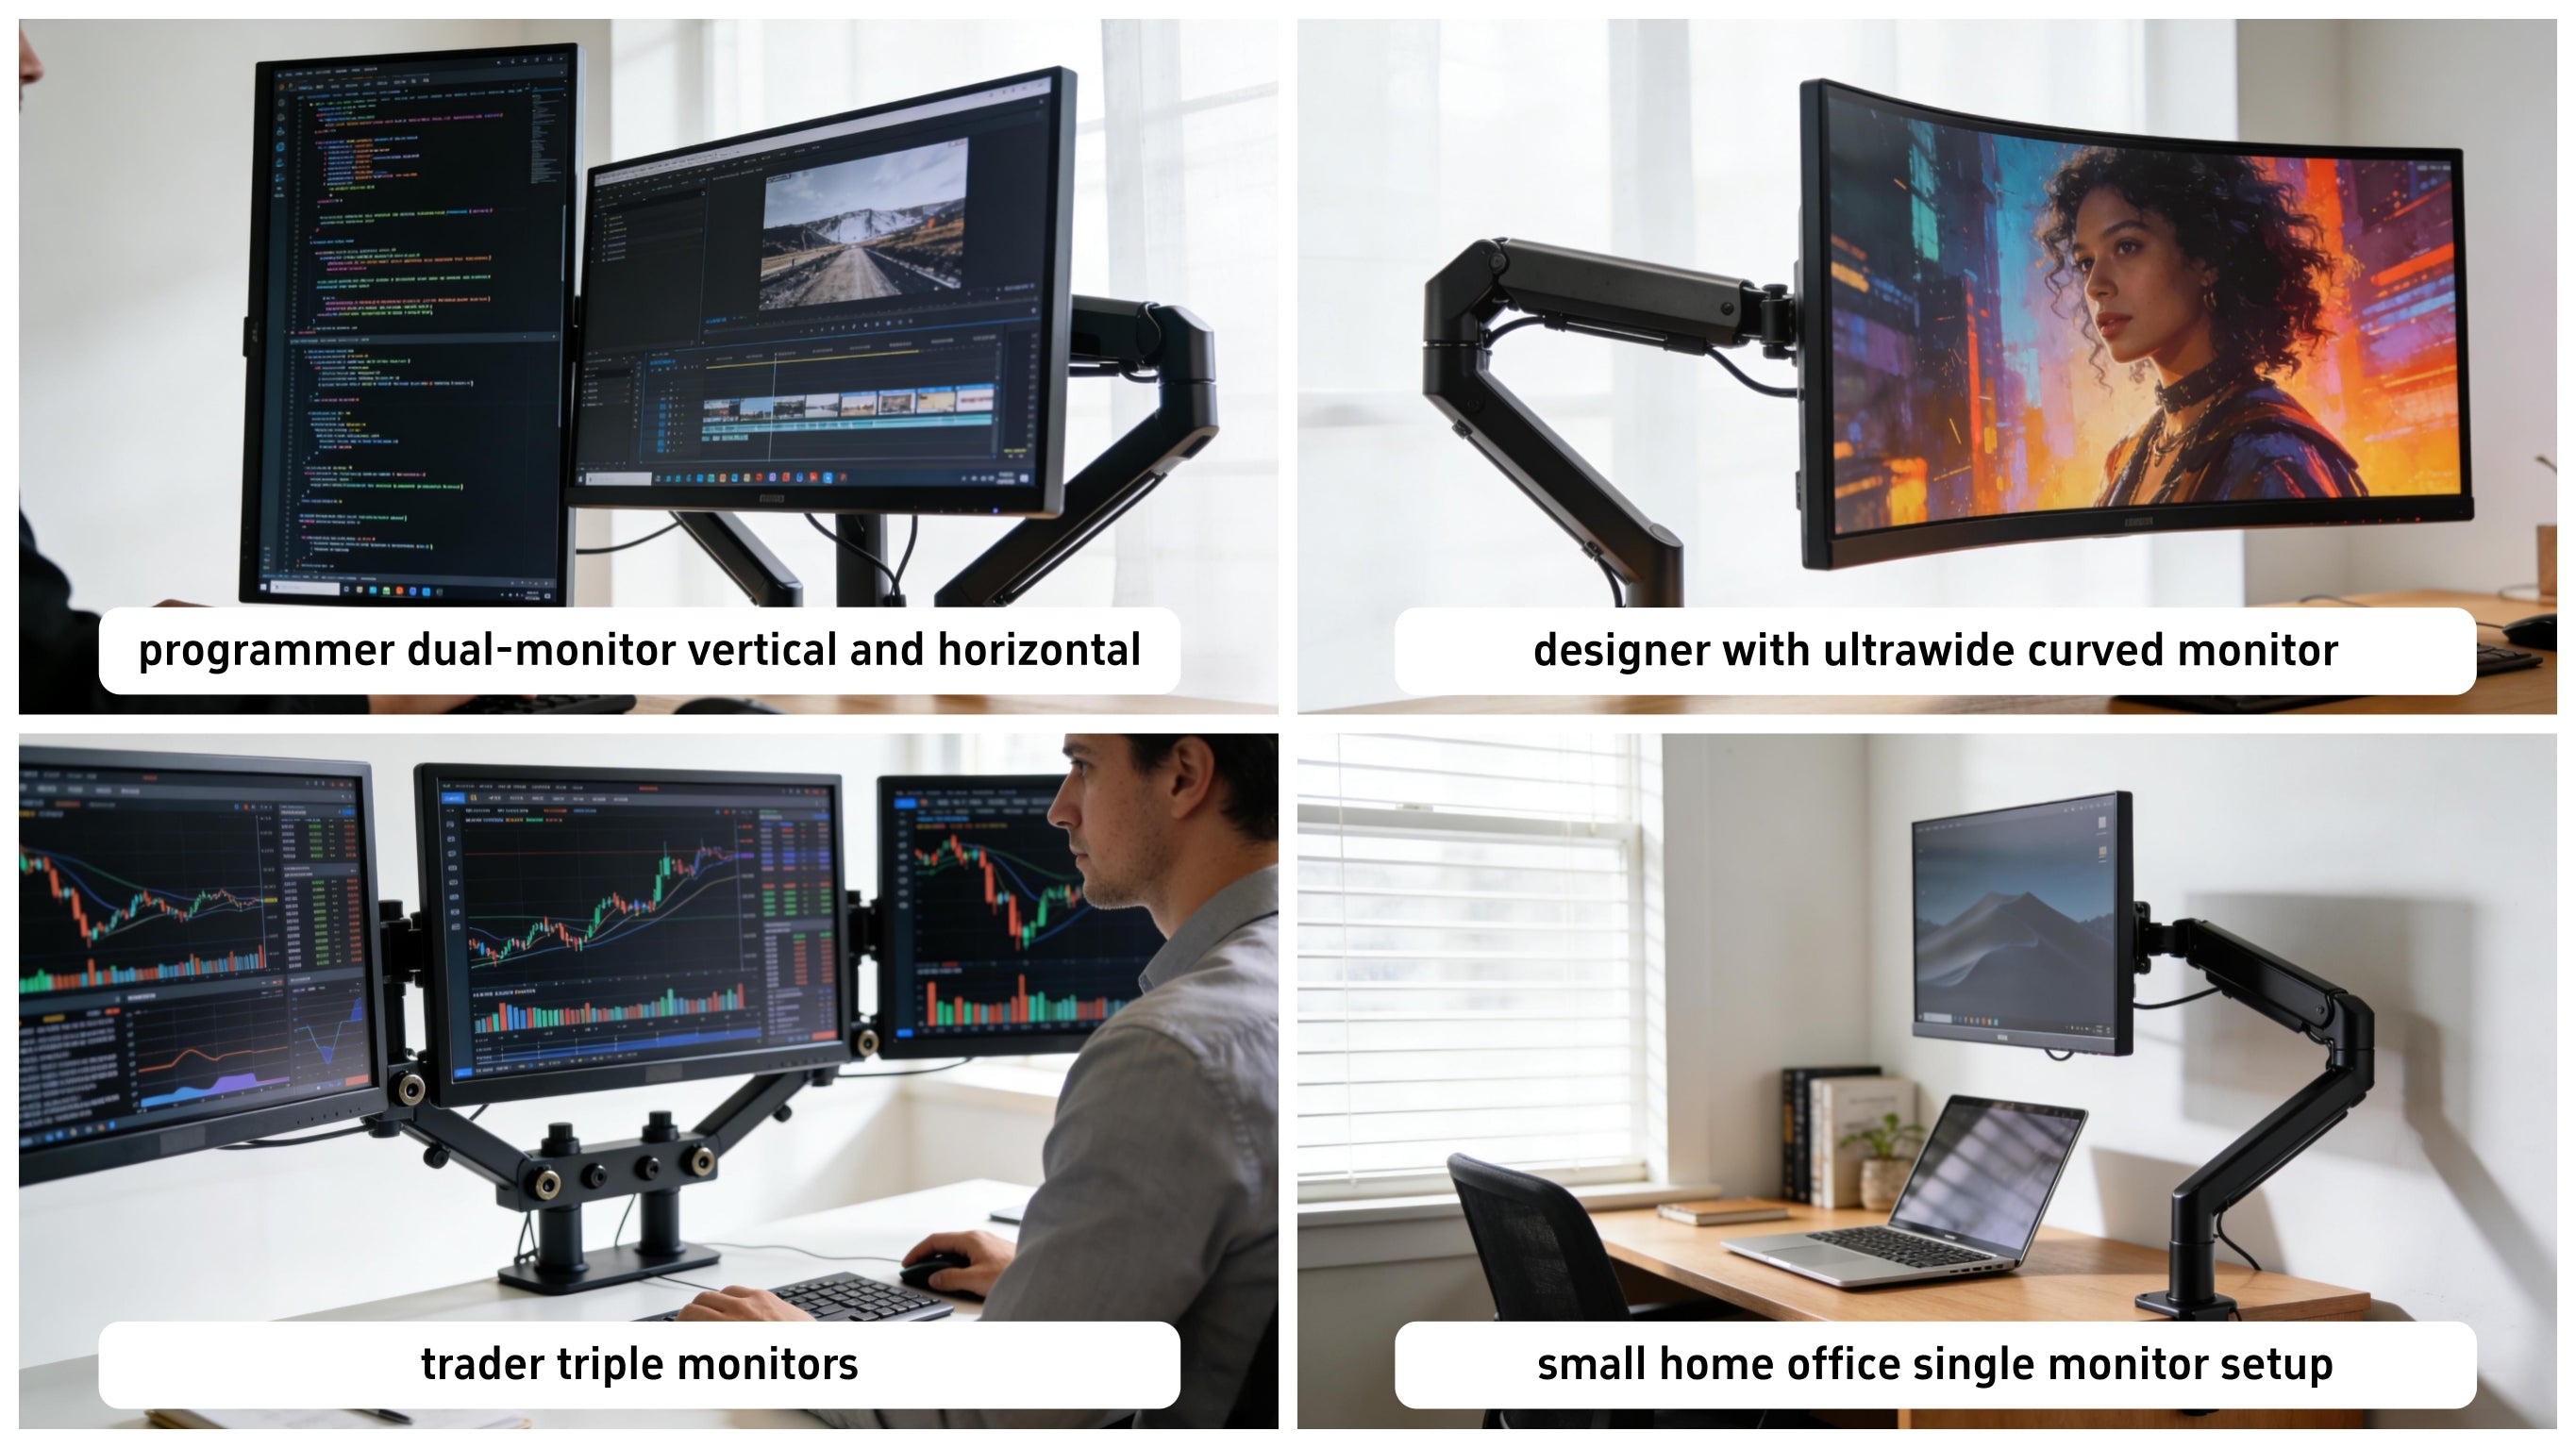
User Scenarios: Tailored Recommendations
Below are practical setups for common user types. Each scenario includes recommended stand/arm type and setup tips.
Coders & Developers
Setup: dual monitors (one vertical for code, one horizontal for preview), adjustable dual-arm or wide platform.
Why: vertical screen organization keeps code lines readable; quick height rotation reduces neck turns.
Designers & Creators
Setup: single or dual ultrawide on a heavy-duty gas arm, ensure arm supports the extra width and weight.
Why: color-critical work benefits from adjustable distance and precise height for accurate viewing angles.
Multi-screen Traders / Analysts
Setup: triple screen arrays, supported by a modular multi-monitor arm with robust mounting points.
Home Office & Small Desk
Setup: compact clamp arm or one-leg riser; use laptop riser + single monitor for hybrid setups.
Key Factors to Evaluate Before You Buy
1. Desk compatibility & mounting method
Check thickness, edge shape, and whether your desk surface is solid or hollow. Common mounting options:
- Clamp mount: attaches to the desk edge; fast and non-destructive for most solid desks.
- Grommet mount: requires a hole in the desk (factory or drilled); very secure.
- Base mount: freestanding base — best when you cannot clamp or drill.
- Wall mount: for specialized setups or space-saving vertical stacking.
2. VESA compatibility
Most monitors use 75×75 mm or 100×100 mm VESA patterns. If your monitor lacks VESA holes, you can use an adapter plate — but be sure it supports the weight of your monitor.
3. Weight capacity & durability
Match arm capacity to your monitor weight and add margin for accessories (webcam, light bars). Look for solid construction materials and reputable warranty terms.
4. Adjustment range & reach
Reach (how far a monitor can extend) is as important as height. Consider your desk depth and whether you want the monitor to tuck away when not in use.
5. Cable management
Built-in cable trays or clips keep your desk tidy and prevent strain on ports when you move the monitor.

Decision Tree: Which Monitor Solution Is Right for You?
Use this quick checklist — choose the first row that matches your scenario.
- If you need a quick posture fix and have limited budget → monitor riser.
- If you switch between sitting & standing → gas-spring monitor arm.
- If you have an ultra-wide >34" or heavy curved screen → heavy-duty dual-arm or single heavy-load arm.
- If desk is hollow or glass and you cannot clamp → base mount or wall mount.
- If you run multiple monitors → multi-monitor rail or multiple arms.
Installation & Practical Tips
Below are step-by-step pointers that reduce mistakes and protect your desk and monitor:
Pre-install checklist
- Measure desk thickness and edge clearance
- Verify VESA pattern and monitor weight
- Remove clutter and pre-route long cables
- Gather tools: Allen keys, screwdriver, measuring tape
Installation highlights
- Clamp tension: tighten until stable but avoid over-compressing soft desk edges.
- Fine-tune gas springs: adjust gas-spring tension so the monitor stays put without drifting or requiring excessive force.
- Route cables: use supplied clips — leave a little slack so ports are not strained during movement.
- Test movement: move monitor through full range and ensure there’s no contact with walls, shelves, or window sills.
This video provides a detailed walkthrough of how to install a monitor stand step by step. It visually explains the mounting process, adjustments, and setup techniques, making it easier for viewers to understand the installation before exploring the in-depth sections below.
Troubleshooting & Longevity Tips
Common issues and fixes
- Monitor drifts down over time: re-tension gas spring or tighten friction joints; check for worn hardware.
- Wobble when typing: re-check clamp gaskets and mounting bolts; consider adding a wider base or reinforcement plate.
- Clamps mark desk edges: add a protective pad or use grommet/base mount instead.
Maintenance checklist
- Every 3 months: verify fasteners and tighten if needed
- Yearly: inspect for metal fatigue around joints (especially for heavy setups)
- Keep ports and cable connectors clean and free from dust
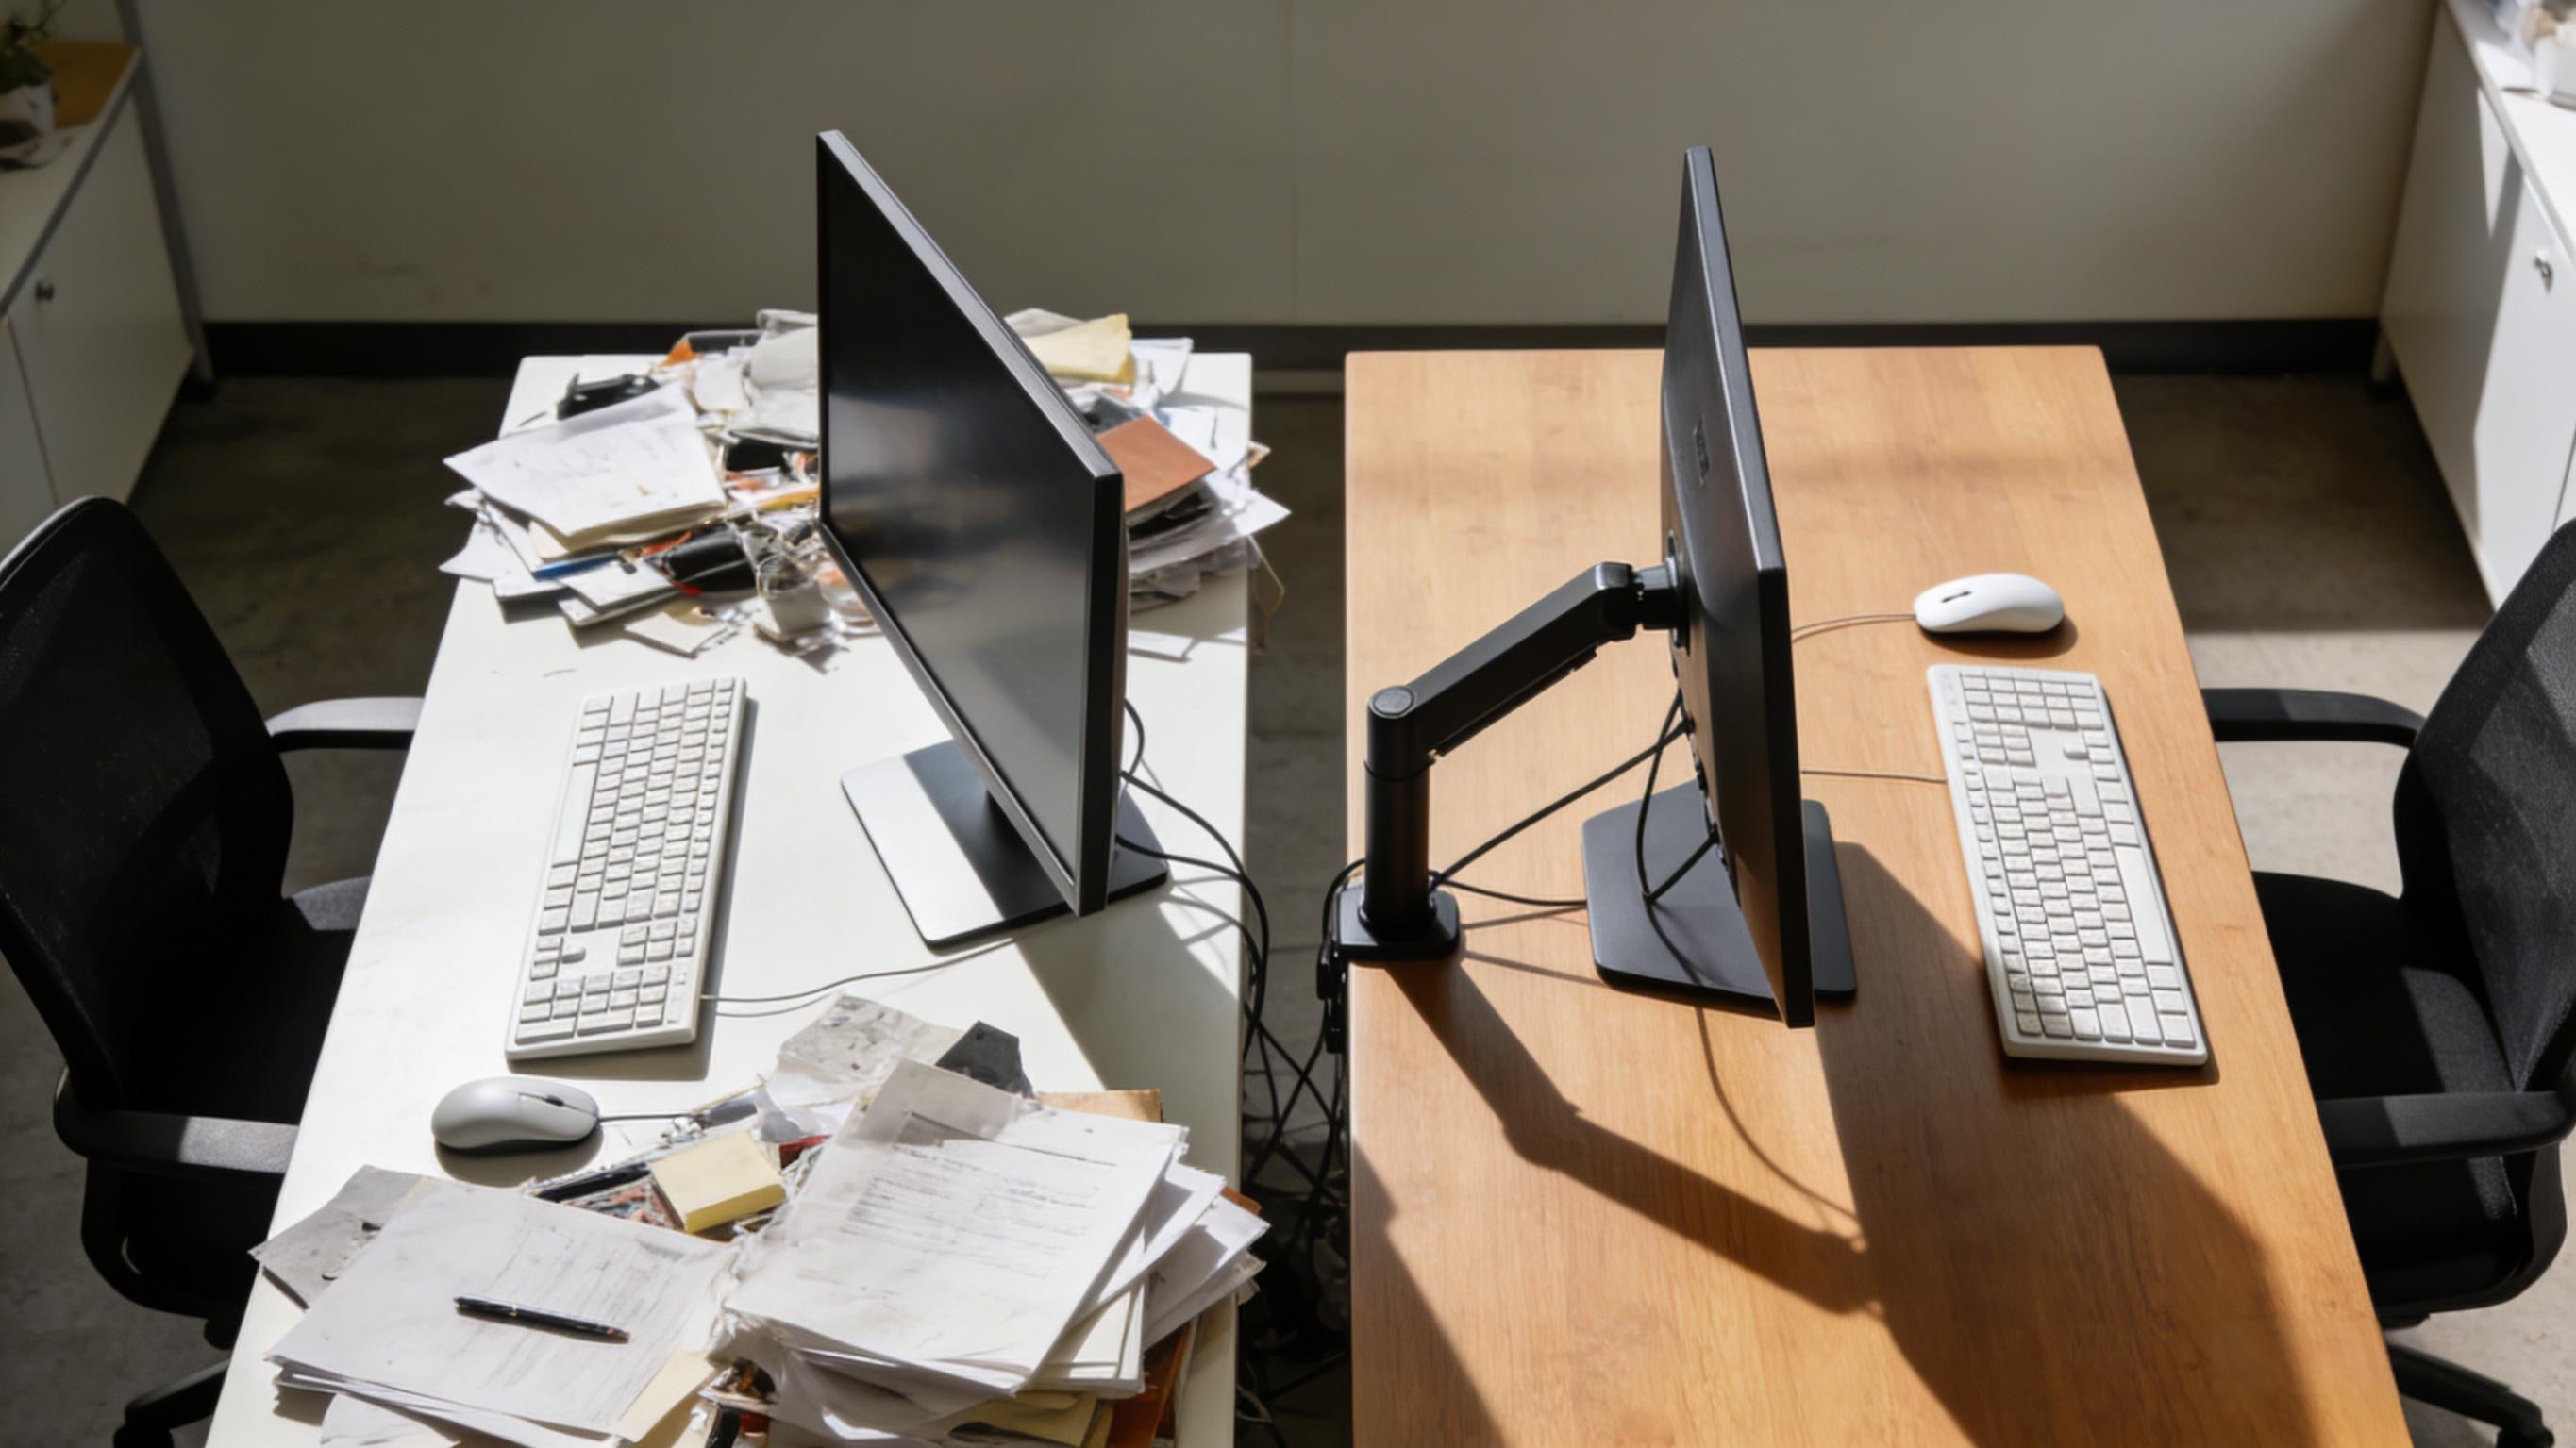
Before & After: Realistic Setup Examples
Concrete examples help readers envision the impact. Include photos showing the exact desk before and after installing the arm or riser.
Expand Your Workstation & Ergonomic Knowledge
A proper monitor height is just one piece of a complete ergonomic workstation. The guides below help you optimize supporting components that contribute to posture, comfort, and productivity during extended desk work.
USB Hub vs Docking Station Guide
Learn how to choose between hubs and docking stations for a clean, efficient desk setup.
Laptop Stand Benefits & Setup
Elevate your laptop for better screen alignment and reduced neck strain.
Foot Rest Posture Guide
Support leg circulation and overall seated alignment during long sessions.
FAQ — Quick Answers to Common Questions
Is a monitor stand really worth it?
Yes — even a small riser can reduce forward head posture and free up desk space. For adjustable ergonomics and multi-user setups, a monitor arm brings the most benefit.
Will a monitor arm damage my desk?
Not if installed correctly. Clamps should be used on solid desks; glass and very thin or hollow desks may require a base or grommet mount with reinforcement.
Do monitor arms support curved/ultrawide monitors?
Many do — pick a heavy-duty arm rated above your monitor’s weight and check VESA compatibility and reach. For very wide/heavy displays, reinforced mounts are recommended.
Conclusion: Small Upgrade, Big Results
A thoughtfully chosen monitor stand or arm dramatically improves ergonomics, desk real estate, and user comfort. Use the decision tree and checklist in this article to pick the right option for your desk and workflow. When in doubt: measure first, add weight margin, and prefer adjustable solutions for long-term benefits.
